July 7, 2014

Konnyaku Somen/こんにゃくそうめん

I'm sure that this particular product and other similar products are nothing new. It's only that this is the very first time that I have purchased this type of product. The product name of this particular product: Konnyaku Somen.
この製品や他の類似の製品は別に珍しい物ではないですが、この種類の製品を買うのは初めてです。この製品の商品名は、「こんにゃくそうめん」。
I thought it would be a good substitute for harusame (cellophane noodles). It contains soybean powder, among others.
春雨のいい代用になると思いました。大豆粉末などが入っています。
And, it has only 12 kcal per 100 g!
それに100 g当たりのカロリーがわずか12 kcalです!
I rinsed it three time thoroughly because it smelled of konnyaku.
こんにゃくの臭いがするので、3回よく洗いました。
I made Chinese-style salad by using it.
それを使って中華風サラダを作りました。
As usual, the dressing is a 3:3:1 mixture of soy sauce, vinegar, and sugar. I left out sesame oil this time.
ドレッシングはいつも通り、醤油、お酢、砂糖を3:3:1で混ぜたものです。今回は、ごま油は省略しました。

The main dish was these cabbage hamburgers.
メインディッシュはこのキャベツハンバーグ。
I placed some pizza cheese on top of them.
ピザ用のチーズを上に載せました。

Atsuage/厚揚げ

For lunch today, I grilled these pieces of atsuage in the toaster oven.
今日の昼ごはんには、この厚揚げをオーブントースターで焼きました。
I then sprinkled some katsuobushi and shredded negi.
それから鰹節ときざみねぎを振り掛けました。
Then, I poured some store-bought mentsuyu (noodle soup).
それから、市販の麺つゆをかけました。

It was very delicious, but what I hated was this store-bought frozen shredded negi.
とても美味しかったですが、嫌だったのは、この市販の冷凍きざみねぎです。
The label simply says, "Reitou (frozen) negi".
ラベルには単に「冷凍ねぎ」と書いてあるだけです。
I bought it, hoping that it might be shredded NAGA negi. I found it was shredded ao negi. As I said many times in my blog, I am an KANTO MAN, and I really don't care for ao negi.
長ねぎを刻んだものだと期待して買ったのですが、青ねぎを刻んだものでした。このブログで何回も言ってる通り、私の関東の人間で、青ねぎは好きではありません。

In Episode 5 of the TV drama, Shinya Shokudo, Master serves a plate of atsuage, with some shredded naga negi on top. Watch the video at around 4:50.
テレビドラマ「深夜食堂」の五話目では、マスターが、上にきざみ長ねぎを載せた厚揚げを出します。4:50辺りを見て下さい。

July 5, 2014

Apricots Microwaved with Sugar/砂糖でチンしたアンズ

It's been rather hot these days, and I've kept making dishes suitable for hot summer days.
この頃はかなり暑いので、暑い夏の日に合った料理を作っています。

For instance, pork meatballs nanban zuke:
例えば、豚肉団子の南蛮漬け:
Today, I wanted to talk about apricots microwaved with sugar. I used to simmer in an enameled pot with a considerable amount of sugar, like I described here.
今日は、砂糖でチンしたアンズのことを話したいと思います。かつては、ここで述べたように、ホーロー鍋で砂糖をかなりたくさん使って煮ていました。

Yesterday, I simply put halved apricots (total weight of 712 g) in a Tupperware container, added only 100 g of sugar, covered the container with plastic wrap, and microwaved several times for a total time of 5-6 minutes.
昨日は、半分に切ったアンズ(合計712 g)をタッパーに入れ、砂糖をたった100 g入れ、ラップをして、電子レンジで数回(合計5~6分)加熱しました。
I tasted some while they were still hot. Very, very sour! I refrained from adding sugar immediately, and I asked my wife and son to taste them to see if they were OK with them. They both said they were OK. I wondered why they said so.
But, today, I tasted some again to find them incredibly tasty. Partly because they were chilled in the fridge, the sourness didn't bother me at all! Instead, I enjoyed the sour and less sweet flavor.
まだ熱いうちに幾つか味見しました。すっごく酸っぱかったです。すぐに砂糖を入れるのは止め、妻と息子に、味見して、大丈夫かどうか確かめるよう頼みました。二人とも、大丈夫だとのこと。何でそう言ったのか不思議でした。
しかし、今日、また味見すると、信じられないほど美味しかったです。冷蔵庫に入れてあったので冷たかったせいもあるでしょうが、酸っぱさは全然気にならなかったです。酸っぱさと甘さ控えめな味を楽しみました。

July 3, 2014

Nasu Miso/なす味噌

I have talked about nasu miso several times already, but I'd like to talk about it again, because it's a different version. Nasu miso is a favorite of my wife's, and she has at least three different recipes, made with ginger, ooba or aojiso (green perilla), and kagura nanban. Kagura nanban is a specialty of Nagaoka and other areas of Niigata. It's similar to green peppers, but is hot and rugged in shape.
なす味噌についてはもう何回も話していますが、また別のタイプのなす味噌なので、話したいと思います。なす味噌は妻の好物で、少なくとも3種類のなす味噌のレシピ―を持っています。生姜、大葉、神楽南蛮で作るレシピ―です。神楽南蛮とは、新潟の長岡などの地域の特産です。ピーマンに似ていますが、辛くて、ゴツゴツした形をしています。

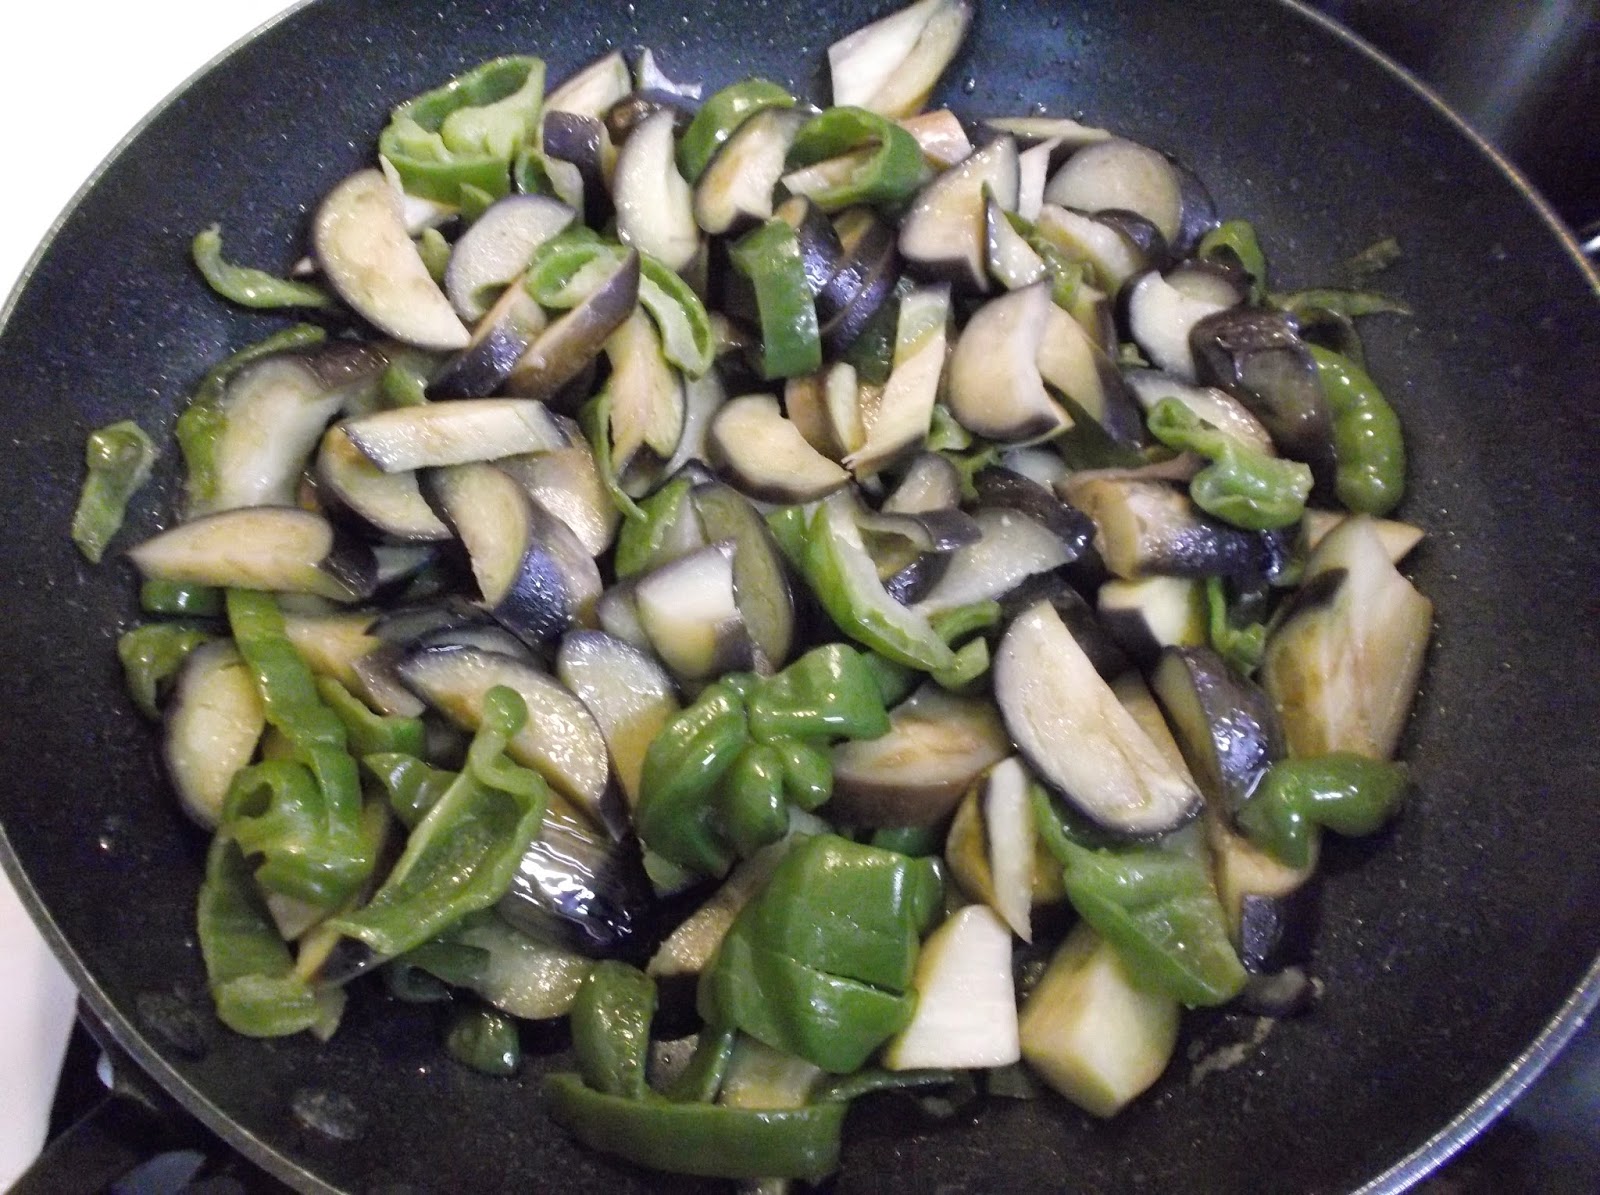
Today, we got six small eggplants from my wife's father and three large ones from my father. We also got some green peppers and two kagura nanban (bottom right) from my wife's father. Perfect time to make nasu miso.
今日は、妻の実父から小さな茄子(なす)を六個、私の父から大きな茄子を3個もらい、また妻の実父から神楽南蛮を2個もらいました。なす味噌を作る絶好のチャンスです。
So, I made nasu miso for my wife. Cut the ingredients, put them in a frying pan, add a relatively large amount of oil, turn on the heat to high, and put on the lid.
と言うわけで、妻のためになす味噌を作りました。材料を切って、フライパンに入れ、比較的多い量の油を入れ、火を高にして、蓋をします。
Remove the lid occasionally to release the steam. The ingredients will be cooked in 4-5 minutes.
蓋を時折取って、蒸気を逃がします。4、5分で火が通ります。
Mix some miso, sugar, and mirin, and add them to the pan.
味噌、砂糖、みりんを混ぜ、フライパンに入れます。
Stir well, and nasu miso will be done in a minute.
良く混ぜて、すぐ完成です。
Keep nasu miso simple.
なす味噌はシンプルに。

July 2, 2014

Takoyaki/たこ焼き

Two days ago, my daughter told me all of a sudden that she wanted to have takoyaki. I simply dismissed her words then. Yesterday, when I checked supermarket flyers, I found that today, July 2, is Hangesho. Hangesho is the 11th day from the summer solstice, and on this particular day, it is customary to have octopus in some regions of Kansai (Western Japan). Recently, that custom has spread slowly but steadily to other parts of Japan, MAINLY DUE TO COMMERCIALISM. Anyway, it's true that we can get octopus cheap on that day, so I asked my daughter if she wanted to have takoyaki the next day. Of course, she said yes. I was still reluctant. Making takoyaki on this hot summer day! My daughter said she would make takoyaki, and my wife also said she would make it.
二日前(ふつかまえ)、娘がたこ焼きを食べたいと突然言いました。その時はその言葉をただ無視していたのですが、昨日、スーパーのチラシを見ていると、今日(7/2)が半夏生(はんげしょう)であることを知りました。半夏生とは夏至(げし)から11日目のことで、この日には、関西のある地域では、たこを食べる習慣があります。最近、この習慣は、ゆっくり、しかし確実に、主に商業主義のせいで日本の他の地域に広がってきました。ともかく、この日には、たこが安く買えることは確かです。と言うわけで、娘に翌日たこ焼きを食べたいか尋ねると、娘は食べたいと答えました。それでも私はまだ気が進みませんでした。この暑い夏の日に、たこ焼き作り!娘は自分で作ると言い、妻も作ると言いました。

So, I bought some octopus (bottom right) today, as well as some octopus karaage (top left).
と言うわけで、今日、たこ(右下)と、たこの唐揚げ(左上)を買いました。 
 
Shown on the bottom right is takoyaki mix. At the top middle is tenkasu (or agedama), tiny balls of tempura batter, a byproduct of tempura making. At the top right is beni shoga (pickled red ginger).
右下にあるのはたこ焼き粉で、上の真ん中にあるのは天かす(揚げ玉)、右上のは紅生姜です。

I made all the preparations, and let my wife and daughter do the rest.
私が準備を全部して、残りは妻と娘にやらせました。


After I took this photo,
この写真を撮った後、
my daughter gave me another one, which contained cheese.
娘がチーズが入ったのをくれました。
She said the one with cheese in it was very tasty.
チーズが入ったのはとても美味しかったそうです。

July 1, 2014

Coffee Roasting with My Perforated Shallow Pot, Final Post/穴あきの浅鍋によるコーヒー焙煎、最終

Edited to add on July 5: I uploaded this and other videos to YouTube.
7/5追記: YouTubeにこのビデオなどをアップしました。


Edited to add on July 27: I hope you view these videos:
7/27追記: 次の2つのビデオを見て下さい:
Coffee roasting with a perforated shallow pot, final version/穴あきの浅鍋によるコーヒー焙煎、最終版
Coffee roasting with a perforated shallow pot, Part 2/穴あきの浅鍋によるコーヒー焙煎、パート2


***
Coffee roasting is largely divided into two types, direct flame and hot air. I regard my way of roasting as the former, and I bring the pot as close to the flame as possible.

Here's a brief description of the coffee roasting procedure:

IMPORTANT: Take all the necessary measures to prevent fires.
Caution: The considerable amount of chaff that comes off the beans during roasting and during cooling is a major problem, so is the amount of smoke generated during roasting. I do the roasting in the garage. If you decided to roast coffee outdoors, make sure that the flame is not affected by wind.


Assumptions:
1. Your portable gas stove has a heating power of about 3 kW (2,600 kW/h).
2. The amount of green coffee beans to roast is 300-400 g in weight.

0. Get all the necessary equipment.
1. Remove defective beans and foreign objects.
(I rarely remove defective beans, except extremely bad ones. I do remove foreign objects such as small stones. I can easily detect defective beans after roasting, and I usually simply remove very bad ones just before grinding.)
2. Measure out the desired amount of coffee beans.
Note that green coffee beans will lose their weight when roasted by about 12 (light roast) to 20% (dark roast).
I usually aim for 14-15% by bringing the beans to the end of first crack. A weight loss of 16% or greater is dark for me.
3. Transfer the beans to the pot, and cover the pot almost entirely, not entirely, with aluminum foil to keep the atmosphere inside the pot moist in the drying phase while at the same time preventing the beans from becoming smoky and also making the beans visible. Be sure to wear leather gloves before starting to roast.
4. Start roasting: Turn on the stove to medium, press the start button of the timer, and bring the pot as close to the flame as possible. And, start shaking!
5. 2 minutes after the start of roasting: Check that no chaff starts to come off the beans (I mean, no chaff falls onto the stove through the holes). If it does, remove the pot from the stove immediately, turn down the heat to low, and start roasting again.
6. 3-4 minutes: Check that chaff starts to come off the beans.
7. 9 minutes: Check that first crack does not occur yet. If it does, remove the pot from the stove immediately, turn down the heat to low, and start roasting again.
8. 10 minutes: The drying phase is almost over.  You may:
a. Turn up the stove to high at this point, and first crack will start soon, or
b. Keep drying the beans for another 2 minutes or so, and then turn up the stove to high, and first crack will start soon.
Note: I'm still a learner myself, and I can't give you definitive advise on when to stop the drying phase and move on to the chemical reaction phase. A lot of factors come into play, especially the weight of the coffee beans. All I can say is to watch the beans carefully to make the decision. Anyway, first crack should start 10-14 minutes after the start of roasting.
I can't talk about second crack because I've never brought my beans to second crack.
EDITED TO ADD: I totally forgot to write about when to remove the aluminum foil. Remove the aluminum foil when the drying phase is over OR remove it 1-2 minutes after the start of the chemical reaction phase. Again, watch the coffee beans carefully and make the decision.
9. Just when you think that your beans have been roasted to your desired level, transfer them to a sieve, and cool them immediately.
10. Measure the weight of the roasted coffee beans, and calculate the weight loss.
***
コーヒー焙煎は大きく、直火(じかび、ちょっか)と熱風(ねっぷう)の2種類に分けられます。私は自分の焙煎方法は直火だと思っているので、鍋をできるだけ炎に近づけています。

以下は、コーヒー焙煎の手順の簡単な説明です。

重要: 火事を防ぐため必要な処置を取ってください。
注意: 焙煎中及び冷却中に豆から剥がれるチャフ、並びに焙煎中に発生する煙は、大きな問題です。私はガレージ(車庫)で焙煎をしています。屋外でコーヒー焙煎をする場合は、炎が風の影響を受けないよう注意して下さい。

仮定:
1. 携帯用のガスコンロの熱量は、3 kW (2,600 kW/h)程度。
2. 焙煎する生豆(きまめ、なままめ)の量は300~400 g。

0. 必要な機材を用意します。
1. 欠点豆と異物を取り除きます。
(私は極端に悪い豆以外は欠点豆を取ることはめったにないです。小さな石など異物は取りますが。焙煎後に欠点豆はすぐに見つけられますし、通常は単に、挽く直前に悪い豆を取り除いています。)
2. 焙煎する量の豆を測ります。
生豆は焙煎すると、12%(浅煎り)~20%(深煎り)程度、重量が減ります。
私の場合、通常は、1ハゼ(いちはぜ)まで持って行って、14~15%を狙っています。16%以上の重量減だと私には深煎りです。
3. 豆を鍋に移し、鍋をアルミホイルでほぼ完全に(完全ではなく)覆います。乾燥段階で鍋の中の雰囲気の湿度を保ち、同時に豆が煙臭くなるのを防ぎ、また豆が見えるようにするためです。焙煎を始める前に必ず皮手(かわて)を着用して下さい。
4. 焙煎開始: コンロを中火にして、タイマーのスタートボタンを押し、鍋をコンロになるべく近づけます。そして振り始めます。
5. 焙煎開始2分後: チャフが豆から剥がれ始めない(つまり、チャフが穴を通してコンロに落ち始めない)ことを確認します。もし剥がれ始めたら、すぐにコンロから鍋を下し、火を弱め、焙煎を再開します。
6. 3~4分: チャフが豆から剥がれ始めるのを確認します。
7. 9分: まだ1ハゼが起きないことを確認します。もし起きたら、 すぐにコンロから鍋を下し、火を弱め、焙煎を再開します。
8. 10分: 乾燥段階はほぼ終わりです。次のどちらかを行います:
a. この時点で火力を高にする。そうすると、1ハゼがまもなく始まります。
b. もう2分程度、豆を乾燥させ、それから火力を高にする。そうすると、1ハゼがまもなく始まります。
注: 私自身、まだ勉強中なので、いつ乾燥段階を終わらせ、化学反応段階に移行させるかについては明確な助言はできません。色んな要素(特にコーヒー豆の重さ)が絡んでいます。言えることは、豆を注意深く観察して、決断すべきだということです。とにかく、1ハゼは焙煎開始から10~14分後に始まるべきです。
2ハゼ(にはぜ)については語れません。2ハゼまで持って行ったことがないので。
追記: アルミホイルをいつ取り去るかについて書くことをすっかり忘れていました。アルミホイルは乾燥段階が終わったら外すか、または化学反応段階の始まりから1~2分後に外して下さい。繰り返しますが、豆を注意深く観察して、決断して下さい。
9. 望みのレベルまで豆が焙煎できたと思ったら、すぐにザルに移し、すぐに冷却します。
10. 焙煎した豆の重さを測り、重量減を計算します。

June 29, 2014

Coffee Roasting with My Perforated Shallow Pot, Continued/穴あきの浅鍋によるコーヒー焙煎、続き


13 minutes passed. I finally removed the aluminum foil from the pot. I tried to post a video, but failed, probably it was too long.
13分経ちました。やっと鍋からアルミホイルを外しました。ビデオを載せようとしましたが、長過ぎるためか、失敗しました。
EDITED TO ADD:
I uploaded this video to YouTube.
追記:
このビデオはYouTubeにアップしました。
Link/リンク


13 minutes and a half passed.
13分半経ちました。 
14 minutes passed. You need to decide when to stop roasting by carefully checking the roast level. I ended up roasting for a total of 15 minutes.
14分経ちました。煎り具合に注意しながら、焙煎をいつ止めるか決める必要があります。私は結局合計15分焙煎しました。 
After the end of roasting, you need to cool the beans immediately to prevent further roasting.
焙煎後は、これ以上の焙煎を防ぐため、急いで冷やす必要があります。

Look at all the chaff.
チャフを見て下さい。
Now, you know why I need a vacuum cleaner.
なぜ掃除機が必要か分かると思います。

The end product:
完成品: 
I thought I successfully roasted them to my preferred level (weight loss of about 14-15%).
私の好きなレベル(14~15%程度の重量減)にまで焙煎できたと思いました。

Unfortunately, I was wrong.
残念ながら、違いました。  
313 g - 1 g (weight of the I-wrap bag) = 312 g. Thus, 13.3% weight loss.
313 g - 1 g(アイラップの重さ) = 312 g。よって、重量減は13.3%。

Anyway, a moderate success, I would say.
ともかく、まあまあ成功です。