August 31, 2013

Shopping in Nagaoka/長岡で買い物

Today, I went to Nagaoka by train. My main purpose was to go to the school festival held at my son's high school, but I was looking forward to doing some shopping in Nagaoka.
It's a one-hour ride from Shiozawa Station to Nagaoka Station, and I bought these on my way to Shiozawa Station to quench my thirst.
今日は長岡に電車で行きました。主な目的は息子の高校の文化祭に行くことでしたが、長岡で買い物をするのを楽しみにしていました。
塩沢駅から長岡駅までは1時間なので、塩沢駅に行く途中で、渇きを癒すため、こんなのを買いました。
Roots Aroma Black (black coffee with no sugar) and Black & Black (gum).
Roots Aroma Black(無糖のブラックコーヒー)とBlack & Black(ガム)。
This particular canned coffee is quite drinkable. (Ten years ago, almost all canned coffee brands were hardly drinkable.)
この缶コーヒーは、かなり美味しいです(10年前は、ほとんどすべての缶コーヒーは飲めたものではなかったです)。
 
I had Yasuda Yogurt soft-serve ice cream in the food court in the Nagaoka station building. As I mentioned previously, the best soft-serve ice cream I've ever had.
長岡の駅ビルにあるフードコートでヤスダヨーグルトのソフトクリームを食べました。前にも述べたように、今まで食べた中で一番美味しいソフトクリームです。 
250 yen.
250円です。
 
I had no food at the school festival. I'm still on a diet. Last year, I had just a lot of foods at the festival as I described here.
文化祭では食べ物は何も食べませんでした。まだダイエット中です。去年はここで述べたように色んな食べ物を食べましたが。
 
At the supermarket in the station building, I bought these:
駅ビルのスーパーでは、こんなものを買いました:
Potato snack and Aki Aji (Autumn Flavor) beer.
ポテトのスナックと秋味ビール。
 
This particular brand is available around this time of year.
この銘柄は一年のうち今頃しか買えません。
Here are some of the items I bought in Nagaoka.
長岡で買った物の一部です。
 
At Marcian (bakery), I bought bread called Dan.
マルシャン(パン屋)では、暖というパンを買いました。
Good enough, but I still prefer Muku.
美味しいですが、無垢のほうが好きです。
 
Wines, green coffee beans (Brazil), roasted coffee beans (Mocha), Lotus biscuits, and prunes.
ワイン、コーヒーの生豆(ブラジル)、焙煎したコーヒー豆(モカ)、ロータスビスケット、プルーン。
Close-up of the green coffee beans:
生豆のクローズアップ写真:
I will roast them myself.
自分で焙煎するつもりです。
 
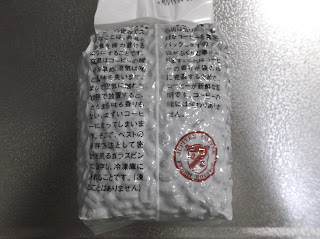
Bag containing Mocha coffee beans:
モカのコーヒー豆が入った袋: 
This particular bag explicitly says that you transfer the beans in an air-tight glass jar and store in the freezer.
この袋には、気密性のあるガラスビンに移し、冷凍庫に入れると書かれています。
 
Lotus Biscuits:
ロータスビスケット:
 
Very good!
とても美味しいです!

August 24, 2013

Dimensions of the 5-Cup Wire-Frame Dripper/5人用金枠ドリッパーの寸法

For those of you who wish to try the Matsuya method of brewing coffee, here are the approximate dimensions of the 5-cup wire-frame dripper available from Flavor Coffee.
松屋式のコーヒーの淹れ方を試してみたい人たちのために、フレーバーコーヒーで売っている5人用の金枠ドリッパーのおよその寸法を紹介します。
 
The stainless steel wire has a diameter of 2 mm, except the four bent segments, which has a diameter of 1 mm.
ステンレスのワイヤの直径は2 mmで、曲がった4つの部分のワイヤの直径は1 mmです。


Matsuya Coffee's Genuine 5-Cup Dripper vs. Flavor Coffee's Version of the Same Dripper/松屋コーヒーの純正5杯用ドリッパーとフレーバーコーヒー版のドリッパー

Matsuya Coffee sells their original wire-frame drippers for 3, 5, 10, and 20 cups, as well as accompanying paper filters for 3, 5, 10, and 20 cups.
松屋コーヒーでは、3、5、10、20人用の金枠ドリッパー、および3、5、10、20人用の紙フィルターを販売しています。
Page listing filters and drippers/フィルターとドリッパーのページ

Flavor Coffee also sells Matsuya's original wire-frame drippers for 3, 5, 10, and 20 cups, among others.
フレーバーコーヒーでも、3、5、10、20人用の金枠ドリッパーなどを販売しています。

Page listing drippers, dome-shaped lids, etc./ドリッパー、ドーム型のふた等のページ

It is important to note that the wire-frame dripper for 5 cups available from Flavor Coffee differs from the genuine one available from Matsuya Coffee.
フレーバーコーヒーで売っている5人用金枠ドリッパーは、松屋コーヒーで売っている純正のものとは異なることに留意してください。

In, Shukan Flavor 53, Nakagawa-san explains why his dripper differs.
週間フレーバー53では、中川さんがその違いを説明しています。

Shukan Flavor 53/週間フレーバー53

At 21:27, he shows the 3-cup dripper.
At 21:41, he compares the 3-cup dripper (right) with the 5-cup dripper available from Flavor Coffee.
At 22:00, he compares the 3-cup dripper (right) with the genuine 5-cup dripper available from Matsuya Coffee.
At 22:15, he shows that the 3-cup dripper fits in Kalita's 300-ml server.
At 22:24, he shows that the genuine 5-cup dripper doesn't fit in the server.
At 22:25, he shows that Flavor Coffee's version fits in the server.
At 23:00, he compares Flavor Coffee's version (right) with the genuine one.
He explains that these portions (four vertical segments) are bent (inward).
At 23:38, he places a 1-cup (2- or 3-cup, I suppose) filter in the genuine 5-cup dripper.
At 23:55, he places the filter in the Flavor Coffee's version.
He explains one great advantage of FC's version: For a small amount of coffee grounds like 20 g, you can get a greater height of coffee grounds than the genuine one, so you can get stronger coffee.
21:27、3人用ドリッパーを見せます。
21:41、3人用ドリッパー(右)をフレーバーコーヒーで売っている5人用ドリッパーと比較します。
22:00、3人用ドリッパー(右)を松屋コーヒーで売っている純正の5人用ドリッパーと比較します。
22:15、3人用ドリッパーがカリタの300 mlサーバーにフィットすることを示します。
22:24、純正の5人用ドリッパーはそのサーバーにフィットしないことを示します。
22:25、フレーバーコーヒー版はサーバーにフィットすることを示します。
23:00、フレーバーコーヒー版(右)と純正品と比較します。
この部分(4本の垂直部分)が(内側に)曲がっていると説明します。
23:38、1杯用(2、3杯用だと思います)のフィルターを純正の5人用ドリッパーに入れます。
23:55、そのフィルターをフレーバーコーヒー版に入れます。
フレーバーコーヒー版の大きな利点を説明します。20 gなど少量のコーヒーの粉では、純正品よりも粉を高くできるので、より濃いコーヒーを淹れられます。

In summary, if you get a 5-cup dripper from Flavor Coffee, you can use it to brew 1-5 cups of coffee, and you need not get a 3-cup dripper.
まとめると、フレーバーコーヒーから5人用ドリッパーを購入すれば、それで1~5人分のコーヒーを淹れられます。3人用のドリッパーは必要ありません。

August 20, 2013

Drip Pot/ドリップポット

I have a Kalita 600S, with a capacity of 600 cc (ml), bought in 2004 from Flavor Coffee. As I mentioned previously here, the pot has had three modifications made to it by Nakagawa-san. He explains how to make the modifications on this page (Japanese only) of the official website of Flavor Coffee.
You will need:
4mm stainless steel countersunk screw
Wooden knob
Silicone tube with an inside diameter of 4 mm to fit into the spout root with an inside diameter of 6 mm
Screwdriver
Pliers
Drill
File
Tweezers

1. Remove the metal knob from the lid, using a drill or something similar, and replace it with a wooden knob.
2. Bend the end of the spout downward to make it drip-proof, using pliers, and finish it with a file.
3. Fold one end of the tube inside out, cut off the other end diagonally, and insert the diagonal end into the spout root. In this way, you can reduce the water flow by half.

Nakagawa-san has a Kalita 1000S, with a capacity of 1000 cc (ml). He has made another modification to his pot as described here: bending the end of the handle upward. The purpose is to prevent the end from being heated when the pot is put on the stove to boil, but he has found that this has an additional effect of making the pot very stable when holding it because he can place his thumb on the bent end.

CAUTION: If you bend the end of the handle, the plating may come off. If you order a Kalita 1000S with a thermometer attached from Flavor Coffee, Nakagawa-san makes all the three modifications to the pot, and makes the fourth modification only if you accept the risk.

In Shukan Flavor No. 113, Nakagawa-san explains the greatest difference between 600S and 1000S, starting at around 34:00.
Shukan Flavor No. 113/週間フレーバーNo. 113
In short, with the 600S, the water comes out of the spout rather diagonally; with the 1000S, it comes out and straight down.

Kalita Drip Pot 600S
Kalita Drip Pot 1000S

Thus, the 1000S is superior, but I still prefer my 600S because it's cuter.
***
私はカリタの600S(容量600 cc)を持っています。2004年、フレーバーコーヒーから購入したものです。ここで述べたように、このポットは、中川さんにより改造が三か所行われています。フレーバーコーヒーのオフィシャルサイトのこのページに改造の方法の説明があります。
次のものが必要です:
4mmのステンレスのさらネジ
木製のつまみ
内径4 mmのシリコンチューブ(内径6 mmの注ぎ口のつけねに挿入する)
ドライバー
ペンチ
ドリル
やすり
ピンセット

1. 蓋から金属のつまみを、ドリルなどを使って外し、木製のつまみと交換します。
2. 注ぎ口の先をペンチを使って下に曲げ、水切れをよくし、やすりで仕上げます。
3. チューブの片方を折り返し、一方を斜めに切り落とし、斜めに切った方を注ぎ口のつけねに挿入します。これで、水量を半分にできます。

中川さんはカリタの1000S(容量1000cc)を持っています。ここで述べられているように、中川さんのポットは、もう一か所改造されています。取っ手の先端を上側に曲げてあります。目的は、ポットを沸騰させるためにコンロにかけた時に先端が熱くなるのを防ぐためですが、曲げた先端に親指を置けるので、ポットを持った時にポットがとても安定するという、もう一つの効果が得られました。

注意: 取っ手の先端を曲げると、メッキがはがれる場合があります。温度計つきのカリタ1000Sをフレーバーコーヒーに注文すると、中川さんは改造を三か所行いますが、四つ目の改造はそのリスクを承諾した場合のみ行います。

週間フレーバーNo. 113では、中川さんは600Sと1000Sの最大の違いを、34:00あたりから説明しています。
Shukan Flavor No. 113/週間フレーバーNo. 113
簡単に言うと、600Sでは、水が注ぎ口から斜めに出ていきますが、1000Sでは、水は出てからすぐ下に落ちます。

Kalita Drip Pot 600S
Kalita Drip Pot 1000S

1000Sのほうが優れていますが、600Sのほうがかわいいので好きです。

Volume 11 of Shinya Shokudo/深夜食堂の第十一巻

Volume 11 of Shinya Shokudo was published on August 4, 2013.
 
List of episodes of Volume 11 of the manga book, Shinya Shokudo
142 Lettuce chahan (fried rice)
143 Beni shoga no tempura (red pickled ginger tempura)
144 Wakame and cucumber sunomono (vinegared dish)
145 Pidan (century egg) tofu
146 Grilled chicken thigh and tulip
147 Shaved ice
148 Tofu kimchi jjigae
149 Fried potato (French fries)
150 Crab cream corokke
151 Nagaimo (lit. long yam) sauteed
152 Simmered taro and squid
153 Takoyaki
154 Tonjiru (pork soup)
155 Corn and butter
 

深夜食堂の十一巻目が2013年8月4日に発売されました。
 
142 レタスチャーハン
143 紅しょうがの天ぷら
144 わかめとキュウリの酢の物
145 ピータン豆腐
146 鶏モモ焼きとチューリップ
147 かき氷
148 豆腐キムチチゲ
149 フライドポテト
150 カニクリームコロッケ
151 長いものソテー
152 里いもとイカの煮もの
153 たこ焼き
154 豚汁
155 コーンバター


Beni shoga tempura is new to me. You won't see it sold in Tokyo, but according to the manga, it's a common item in supermarkets in Osaka.
紅しょうがの天ぷらは私は知りませんでした。東京では売ってないと思いますが、漫画によれば、大阪ではスーパーで普通に売っているそうです。
 
In Japan, wakame (a type of seaweed) and cucumbers are a very common combination.
日本では、わかめ(ワカメ、若布)ときゅうりは、とても一般的な組み合わせです。
 
So are taro and squid. They are often simmered together.
里いも(サトイモ、里芋)とイカ(いか、烏賊)も同様です。よく一緒に煮込みます。
 

August 13, 2013

Learning from Shukan Flavor, Part 6/週間フレーバーで学ぶ パート6

In Shukan Flavor 22, Trying Extraction Temperatures, Nakagawa-san first brews coffee with two versions of the Matsuya method and with the Yasunaga method. He then gives wonderful suggestions for those who do not have a proper drip pot.
「週間フレーバー22・抽出温度を試す」 では、中川さんはまず、二種類の松屋式とヤスナガ式でコーヒーを淹れ、次に、ちゃんとしたドリップポットを持っていない人のために素晴らしいアドバイスをしてくれます。

Shukan Flavor 22/週間フレーバー22

Suppose you have a pot in your kichen, you can use it to brew coffee if you have some kite string and a stainless steel nut. Watch the video at 58:30.

If you have a server/carafe, you can use it instead of a pot. Watch the video at 1:00:24.

You can also use a paper cup. Make a hole with an ice pick. Watch the video at 1:02:08.

You can also use a teapot with a "squitter" (sp?) inserted into the spout. See the video at 1:05:46. He cuts one end of a twist tie diagonally, bends the tie in half, and inserts it into the spout.
台所に鍋があれば、たこ糸とステンレスのナットがあれば、コーヒーを淹れられます。58:30のビデオを見てください。

鍋の代わりにサーバーも使えます。1:00:24のビデオを見てください。

紙コップも使えます。アイスピックで穴をあけます。1:02:08のビデオを見てください。

ティーポットの注ぎ口に「スキッター」を差し込んで使うこともできます。1:05:46のビデオを見てください。ビニタイ(ビニールタイ)の片方を斜めに切り、半分に折り曲げ、注ぎ口に入れます。

I must say Nakagawa-san is very generous in imparting his knowledge on Shukan Flavor videos, on his website, and elsewhere.
中川さんは、週間フレーバーやサイトなどで、知識を惜しみなく教えてくれます。

I want to try the paper cup suggestion some day.
紙コップをいつか試したいと思います。

August 11, 2013

Learning from Shukan Flavor, Part 5/週間フレーバーで学ぶ パート5

In Shukan Flavor No. 109, Nakagawa-san proves how efficiently Matsuya's original wire-frame dripper can release gas (carbon dioxide) from coffee grounds.
週間フレーバーNo. 109では、中川さんは、松屋の金枠ドリッパがどれほど効率的にコーヒーの粉からガス(二酸化炭素)を抜けるかを証明しています。

Shukan Flavor No. 109/週間フレーバー No. 109

He makes four experiments in total.
He first puts coffee grounds in an acrylic pipe, and pours some water to "steam" them. In 3 minutes, he pours more water. Most of the coffee grounds float on water, indicating that they still have gas in them and are lighter than water. Watch the video at around 11:10.
He then puts coffee grounds in a Matsuya dripper, and steams it in the Matsuya way. In 3 minutes, almost all the coffee grounds sink under water, except waxy, water-repellent portions. See the video at around 22:45.
Thirdly, he uses Melita's 1x2 dripper. Watch the video at around 34:20. Most of the coffee grounds float on water. Fourthly, he uses Hario's cone-shaped dripper. Watch the video at around 51:20.
実験を全部で4つ行います。
まず、アクリルのパイプにコーヒーの粉を入れ、お湯を入れ、「蒸らし」をします。3分後、お湯をもっと入れます。大半のコーヒーの粉が水に浮きます。まだガスを含み、水より軽いことを示します。11:10あたりのビデオを見てください。
次にコーヒーの粉を松屋式のドリッパーに入れ、松屋式で蒸らしを行います。3分後、ろう質で水をはじく部分以外、ほとんどのコーヒーの粉は水に沈みます。22:45あたりのビデオを見てください。
三番目に、メリタの1x2ドリッパーを使います。34:20あたりのビデオを見てください。大半のコーヒーの豆は水に浮きます。四番目に、ハリオの円錐形のドリッパーを使います。51:20あたりのビデオを見てください。

If you ever attempt to make coffee in the Matsuya way, you are recommended to use Matsuya's original wire-frame dripper or make a similar dripper by yourself.
松屋式でコーヒーを淹れる場合は、松屋の金枠ドリッパーを使うか、または自分で似たようなドリッパーを作ることを薦めます。

Basics of the Matsuya Method/松屋式の基礎

Here I attempt to describe the basics of the Matsuya method of brewing coffee.
松屋式のコーヒーの入れ方の基礎を説明しようと思います。

Note: Throughout my blog, the term "Matsuya method" refers to Nakagawa Masashi's version of the Matsuya method, not the version of the Matsuya method that is practiced at Matsuya Coffee today.  Nakagawa-san learned the method more than twenty years ago (when he was around twenty) from the previous president of Matsuya Coffee, who developed this method. Now the two versions of the Method are considerbly different.
注: このブログでは、「松屋式」とは、中川さんバージョンの松屋式(現在、松屋コーヒーで行われているバージョンの松屋式ではなく)を指します。中川さんは20年以上前(20歳前後の頃)に松屋コーヒーの先代(松屋式を開発した方)からこの方法を学びました。現在では、両バージョンの松屋式はかなり異なります。

Two main features of the Matsuya method are:
1. 3-minute "murashi" (lit. steaming), which ensures that all gas (carbon dioxide) in the coffee grounds is replaced with water.
2. Extraction of flavorful components based on the fact that flavorful components are more soluble than unflavorful components.
松屋式の主な2つの特徴は:
1.3分の蒸らし。これにより、コーヒーの粉の中のガス(二酸化炭素)をすべて水に置き換える。
2.旨味成分の抽出。これは、旨味成分のほうが雑味成分より溶けやすいという事実に基づく。

Suppose that you want to get stains out of your clothes, what do you do? You can never get them out unless you soak the clothes thoroughly in water. The same is true for coffee brewing. Matsuya's original wire-frame dripper is very efficient in releasing gas from coffee grounds and replacing it with water to place the coffee grounds in a state where flavorful components can be extracted easily.
服についた汚れを取りたいとしたら、どうしますか?服を水に完全に漬けなければ、汚れを取ることはできません。コーヒーの抽出も同じです。松屋の金枠ドリッパーは、とても効率的にコーヒーの粉のガスを抜き、水に置き換え、コーヒーの粉を旨味成分が抽出しやすい状態にします。

After 3-minute murashi, you have to pour water in such a way to keep the coffee grounds in the "hitahita" state. Hitahita refers to a state where the coffee grounds are barely covered with water.
3分の蒸らしの後、コーヒーの粉を「ひたひた」の状態に保つようにお湯を入れる必要があります。「ひたひた」とは、コーヒーの粉が水にほぼ浸かっている状態を言います。

You can get a general understanding by watching the 4-minute video, made by Nakagawa-san:
中川さんが作成した、次の4分間のビデオを見れば、大まかに理解できます。
Link to the video/ビデオへのリンク

Note that with the Matsuya method, you use a coarse grind. To be more precise, the grind must be so coarse that you can brew 300 ml coffee from 50 g coffee grounds in 1.5 minutes by keeping the hitahita state, described earlier.
松屋式では、粗挽きを使います。正確に言うと、50 gのコーヒーの粉からコーヒー300 mlを、上述したひたひたの状態を保ちながら、1.5分で淹れられる粗さにします。

In the video, Nakagawa-san first shakes the coffee grounds in the dripper, and then digs a hole with the back of a spoon. Without a hole, the upper part of the coffee grounds would bloom before the water reaches the lower part of the grounds, resulting in uneven "murashi" (lit. steaming). The fresher the coffee grounds, the deeper the hole should be.
ビデオでは、中川さんがまずドリッパの中のコーヒーの粉を振り、スプーンの裏で穴を掘ります。穴がないと、お湯がコーヒーの粉の下部に届く前に上部が膨らみ、蒸らしが均一にできなくなります。コーヒーの粉が新鮮なほど、穴を深く掘ります。

The water in the drip pot should be 95C. Shake the pot slightly to let out the steam. Start pouring water at the center. After checking that coffee starts dropping into the carafe, move the drip pot in a circular motion. He often use this expression: (Pour water on) the boundary between wet and dry portions. Stop pouring when all the coffee grounds are wet. Put on a lid (preferably a dome-shaped one) and wait for 3 minutes. Remove the lid, and pour water again, starting at a midpoint between the center and the circumference because that's where the coffee grounds are less likely to crumble. (Nakagawa-san does not reheat the water. The temperature should be dropped to around 90C.) When the water level reaches hitahita, you can start pouring at the center. You should pour water near the center intensively and near the circumference less intensively, because there are more coffee grounds at and near the center and least of them near the circumference. While pouring, keep the hitahita state and keep the coffee grounds from moving about. Letting the coffee grounds move about will cause unflavorful components to be extracted. In about 1.5 minutes, you will get half the necessary amount in the carafe. Be sure to stop pouring water at the center. Now you get very strong coffee. Dilute the coffee with an equal amount of water.

I will talk more about the Matsuya method in future posts.
ドリップポットのお湯は95Cにします。ポットを軽くゆすり、蒸気を逃がします。真ん中にお湯をさし始めます。サーバーにコーヒーが落ちるのを確認してから、ドリップポットを円を描くように回します。中川さんはよく、「濡れてるところと乾いてるところの境界部分(にお湯をかける)という表現を使います。コーヒーの粉が全部濡れたら、お湯をさすのをやめます。ふた(できればドーム型)をして、3分待ちます。ふたを取り、お湯をまたさし始めます。この時、真ん中と周辺の中間地点から始めます。そこがコーヒーの粉が一番崩れにくいところだからです(中川さんはお湯は再加熱しません。お湯の温度は90C前後になっています)。水位がひたひたになったら、真ん中にお湯をさしても大丈夫です。真ん中付近は丁寧にさし、周辺部分はいい加減にさします。これは、真ん中付近はコーヒーの粉が多く、周辺は少ないからです。お湯をさしている間、ひたひたの状態を保ち、コーヒーの粉が動かないようにします。コーヒーの粉を動かすと、雑味が抽出されてしまいます。1.5分程度で、サーバーに必要量の半分ができます。必ず、お湯は真ん中でさすのをやめます。これでとても濃いコーヒーができます。コーヒーを同量のお湯で薄めます。
今後、松屋式についてさらに語るつもりです。

Learning from Shukan Flavor, Part 4/週間フレーバーで学ぶ パート4

Shukan Flavor 4 is about nel (flannel) drip.
週間フレーバー4はネルドリップについてです。

Shukan Flavor 4: Playing with Nel Drip/週間フレーバー4・ネルドリップで遊ぶ

First of all, Nakagawa-san says that as for nel drip, there are a number of "schools" or "factions", which may be fastidious, and he himself has nothing to do with such matters at all. He simply intends to describe his way of nel drip. He has no intention to pick a fight with anyone. As a pacifist, he has to make this clear first.
最初に中川さんはネルドリップに関しては、うるさい派閥が多く、中川さん自身はそういうこととは全く縁がないそうです。中川さん自身のネルドリップの方法を説明するだけで、誰かにけんかを売る気はまったくないそうです。平和主義者としては、まずそこを明確にしたいそうです。

He says that a brand-new nel is no good. It has to be used 100 times to make coffee so that it gets stained with oil, letting oil pass through it. Once used, a nel should be washed with water alone. No detergent should be used. He introduces a clever way to stain a brand-new nel with oil instantly. At 13:05, he starts pouring espresso coffee in the nel, three cups in total. The brand-new nel is now ready for use.

新品のネルはダメだそうです。100回コーヒーを淹れるのに使って、オイルで汚し、油を通せるようにする必要があるそうです。一旦ネルを使い始めたら、ネルは水で洗うだけです。洗剤は使いません。新品のネルを即座にオイルで汚す、すごい方法を紹介してくれます。13:05、ネルにエスプレッソコーヒーを入れます(全部で3杯)。新品のネルがもう使えるようになります。

A nel is raised on one side. Brewing coffee with the raised side out is no different from brewing with the Matsuya method, he says. At 21:40, he starts brewing coffee with the raised side out. At 23:10, he starts brewing coffee with the Matsuya method.
ネルは片方が起毛しています。起毛した側を外側にしてコーヒーを淹れることは、松屋式で淹れるのと変わらないそうです。21:40、外起毛でコーヒーを淹れ始めます。23:10、松屋式でコーヒーを淹れ始めます。

At 33:52, Sae-chan (assistant) tastes both brews. Nakagawa-san says that the coffee made with the nel may be a little weak but it feels as if it went around in the mouth because of the oil.
33:52、さえちゃんが2つのコーヒーを試飲します。中川さんによれば、ネルで淹れたコーヒーはちょっと薄いかもしれないが、油があって、口の中で回るような感じになるそうです。

At 40:45, Nakagawa-san shows the coarse grind for use to make coffee with the raised side out, and at 40:54, he shows the fine grind for use to make coffee with the raised side in.
40:45、中川さんは外起毛でコーヒーを淹れるための粗挽きを見せ、40:54には、内起毛でコーヒーを淹れるための細挽きを見せます。

At 42:47, he starts pouring water. The coffee grounds bloom considerably. At 44:12, after the coffee grounds have sunk, he starts pouring water in a floral pattern. The resultant coffee is very strong.
42:47、お湯を入れ始めます。コーヒーの粉はすごく膨らみます。44:12、コーヒーの粉が沈んでから、お湯を花びらの形に入れ始めます。できたコーヒーはとても濃いです。

At 57:42, Nakagawa-san starts pouring water, with the raised side in, to demonstrate double filtering. He does not do murashi (steaming). At 1:01:03, Sae-chan tastes the coffee and says it tasts bad. He then does double filtering, that is, simply put the coffee back to the nel. With a paper filter, you couldn't do double filtering because the filter would clog. At 1:03:00, Sae-chan tastes the coffee and says that it is better. In response to a comment from a viewer, Nakagawa-san says that the coffee will taste even better if filtered another time. Coffee grounds have the ability to adsorb off-flavors.

57:42、中川さんは二度ごしを見せるため、内起毛で水を入れ始めます。「蒸らし」は行いません。1:01:03、さえちゃんがコーヒーを試飲して、美味しくないと言います。中川さんは二度ごしを行います。単にコーヒーをネルに戻すだけです。ペーパーフィルターでは、詰まってしまうので、二度ごしはできません。1:03:00、さえちゃんがコーヒーを試飲して、「ましになってる」と言います。視聴者からのコメントに答えて、中川さんは、もう一回こせば、もっと美味しくなると言います。コーヒーの粉には雑味を吸着する力があります。

Nels require meticulous management. According to Nakagawa-san, a nel has to be kept in water to prevent the oil in it from oxidation, and the water must be changed twice a day, in the morning and in the evening.
ネルは細心の管理を必要とします。中川さんによれば、ネルは水につけておき、ネルの中の油の酸化を防ぐ必要があり、その水も一日二回、朝晩に替える必要があります。

Learning from Shukan Flavor, Part 3/週間フレーバーで学ぶ パート3

Shukan (= Weekly) Flavor 9 is about extraction temperatures.
週間フレーバー9は抽出温度についてです。

Shukan Flavor 9/週間フレーバー9

Nakagawa-san makes three experiments: ordinary way of brewing coffee (Kalita method, although using Matsuya's wire-frame dripper), one type of the Matsuya method, where he pours water as if to "place" it on the coffee grounds, and the other type of the Matsuya method, where he pours water at a height of 30 cm.
中川さんは実験を3つします:一般的なコーヒーの入れ方(カリタ式。松屋の金枠ドリッパーを使っていますが) 、一種類の松屋式(「コーヒーの粉に水を「のせる」ようにお湯を入れる)、もう一種類の松屋式(高さ30 cmからお湯を入れる)。

He first says that what is important is the temperature of the coffee grounds, not that of the water in the drip pot.
まず、重要なのはドリップポットの中のお湯の温度ではなく、コーヒーの粉の温度だそうです。

At 9:38, he starts pouring water to bloom the coffee grounds. The temperature of the water in the drip pot is 95C. He waits until the coffee grounds sink twice (coffee grounds temperature: 72.6C), then starts pouring water. The water flow is thicker than with the Matsuya method. The coffee grounds reach 89C or higher. When he finishes pouring, the coffee grounds are 87.8C. With this method, the temperature of coffee grounds will become almost equal to that of the water, he says.
9:38、お湯を入れ始め、コーヒーの粉を膨らませます。ドリップポットの中のお湯の温度は95Cです。コーヒーの粉が二回沈むのを待ち(コーヒーの粉の温度: 72.6C)、お湯を入れ始めます。お湯は松屋式と比べると太いです。コーヒーの粉は89C以上にも達します。お湯を入れ終わると、コーヒーの粉の温度は87.8C。この方法では、コーヒーの粉の温度は、お湯の温度とほぼ同じになるそうです。

At 14:40, Nakagawa-san shows chikutan (bamboo charcoal) muddlers, which are said to be capable of adsorbing off-flavors. You don't have to use a chikutan muddler if you can make flavorful coffee, because it will "blur" the flavor.
14:40、中川さんは竹炭マドラーを見せます。雑味を吸着できると言われています。美味しいコーヒーを淹れられるなら、竹炭マドラーを使う必要はありません。使うと味が「ぼやける」そうです。

At 21:40, he starts brewing coffee with one type of the Matsuya method. (I think this type is Nakagawa-san's version of the Matsuya method.) The initial temperature of the water is 95C. He waits for 3 minutes until the coffee grounds are fully "steamed". The temperature of the coffee grounds is 75.4C. He then starts pouring water. The water temperature is now 90C (Nakagawa-san does not reheat the water). The coffee grounds reach 80C. With the Matsuya method, the temperature of the coffee grounds is lower than that of the water.

With this type of the Matsuya method, which does not stimulate the coffee grounds and does not let oil pass through the paper filter, you will get coffee with clear flavor suitable for drinking black.

21:40、一種類の松屋式(中川さんバージョンの松屋式だと思います)でコーヒーを淹れ始めます。お湯の初期温度は95Cです。3分間、コーヒーの粉が完全に蒸されるまで待ちます。コーヒーの粉の温度は75.4C。お湯を入れ始めます。お湯の温度は90C(中川さんはお湯を再加熱しません)。コーヒーの粉は80Cに達します。松屋式では、コーヒーの粉の温度は水の温度より低くなります。

この種類の松屋式は、コーヒーの粉を刺激せず、オイルがペーパーフィルターを通らないので、きれいな味で、ブラックで飲むのに合うコーヒーができます。

At 32:12, Nakagawa-san starts brewing coffee with the other version of the Matsuya method (I think it is the current version of the Matsuya method, practiced at Matsuya Coffee). At 36:24, he starts pouring water from a height of 30 cm. At 36:57, he starts explaining the "edge of the surf" theory. It's hard to run on dry sand, it's hard to run on sand in water, but you can run at the edge of surf because the sand is hard. When you pour water from a high position, the water force reaches the paper filter, letting oil pass through it. With this type of the Matsuya method, you will get thick coffee suitable for drinking with milk.
32:12、中川さんは、もう一つの種類の松屋式(松屋コーヒーで実践している、現在のバージョンの松屋式だと思います)でコーヒーを淹れ始めます。36:24、30 cmの高さから水を入れ始めます。36:57、「波打ち際」理論を説明し始めます。乾いた砂の上を走るのは難しいし、水の中で砂の上を走るのも難しい、が波打ち際では、砂が固いので、走ることができます。お湯を高い位置から入れると、お湯の力がペーパーフィルターにまで届き、オイルがフィルターを通ることができます。この種類の松屋式では、とろみのある、ミルクと一緒に飲むのに合うコーヒーができます。

The coffee grounds reach 79C, slightly lower than that with the former type of the Matsuya method. Nakagawa-san says even dark roast coffee beans will result in less bitter coffee if brewed at a lower temperature, which will bring you to the discussion on the Yasunaga method of brewing coffee.
コーヒーの粉は79Cに達します。前者の松屋式より若干低いです。中川さんによれば、深煎りの豆でも低い温度で淹れれば、苦くないコーヒーができるそうです。それは、ヤスナガ式のコーヒーの淹れ方につながっていくそうです。

August 6, 2013

Learning from Shukan Flavor 2/週間フレーバーで学ぶ 2

Last Tuesday, I ordered some more coffee, together with a bag of Matsuya's original paper filters for 5 cups, because I wanted to do some experiments. They arrived last Thursday.
先週の火曜日、コーヒーを少しと、松屋式のペーパーフィルター(5杯用)を注文しました。
ちょっと実験をしたかったからです。先週の木曜日に届きました。
The Matsuya drip method is explained on the back.
裏側に松屋式ドリップ法が書かれています。
Three bags of the same brand (Mocha) with different grinds (coarse, medium, and fine):
銘柄は同じ(モカ)で、挽き方が違う(粗挽き、中挽き、細挽き)3袋:
Close-up:
クローズアップ: 
I first tried the medium grind.
Compare Matsuya's paper filter with Kono's (for 2 cups):
まず、中挽きを試しました。
松屋のペーパーフィルタとコーノの(2杯用)との比較:
As you can see, Matsuya's paper filter is sewn at one end.
見て分かる通り、松屋のペーパーフィルタは片側がミシンで縫ってあります。
 
50 g of the medium grind:
中挽き50 g:
After 3-minute "murashi" (steaming):
3分間の「蒸らし」後: 
After 300-cc brewing:
300 cc抽出後: 
It took me about 2 seconds and 45 minutes to brew this amount.
これだけの量を抽出するのに約2分45秒かかりました。 
According to Shukan Flavor No. 70, the brewing time should be about 1 minute and 30 seconds (50 g coarse grind, 300 cc  coffee). I think 2 minutes and 45 seconds is too long even if the grind is medium. Even for a coarse grind, it takes me to more than 2 minutes to brew 300 cc coffee. I have posted a question there, as ymhr312.
週間フレーバーNo. 70では、抽出時間は1分30秒程度(粗挽き50 g、コーヒー300 cc)だそうで、2分45秒は中挽きだとしても長すぎると思います。粗挽きでさえ、300 ccのコーヒーの抽出に2分以上かかります。ymhr312として質問をしてあります。

Naturally, I diluted the coffee with an equal amount of water.
もちろん、コーヒーは同量のお湯で薄めました。

I drank a cup, and found it was very similar to the type of coffee served at most kissaten (coffee houses) in Japan.  Anyway, it was bitterer than the coffee I make from coarsely ground coffee.
一杯飲みました。大半の喫茶店で出すようなコーヒーにとても似ていました。ともかく、粗挽きのコーヒーで入れるコーヒーより苦かったです。
I was reluctant to use the fine grind, because I didn't want to have much bitterer coffee. Today, while watching Shukan Flavor 1 (Learning Cold-Brew Coffee), I learned a very good way of using the find grind: "Ice brewing" coffee.
これ以上苦いコーヒーを飲みたくないので、細挽きは使いたくなかったのですが、今日、週間フレーバー1(水だしアイスコーヒーを学ぶ)を見ていて、細挽きのいい使い道を知りました。「氷出しコーヒー」です。
 
I used a 900-ml PET bottle. I cut the bottom of the bottle with my outdoor knife, not completely but leaving some portion uncut. Then, I plugged the top with a paper towel from the inside, and covered the top with another paper towel from the outside and secured the towel with a rubber band.
900 mlのPETボトルを使いました。ボトルの底をアウトドアナイフで切り(完全にではなく、少し切らずにおいて)、キッチンペーパーで上部を内側から塞ぎ、別のキッチンペーパーで上部を外側から包み、輪ゴムでとめました。
I inserted the bottle into the server, upside down, and put 50 ml of the fine grind.
ボトルを逆さにサーバーに入れ、細挽きを50 ml入れました。 
Then, I wetted the coffee grounds with hot water. I then filled the bottle with cubes of ice.
次にお湯でコーヒーの粉を濡らしました。 次に氷をボトルに一杯入れました。
Top view:
上から見たところ:
I then closed the bottom with cellophane tape to keep off dust.
ごみが入らないよう、セロテープで底を閉じました。

It will take about 6 hours to brew coffee this way.
この方法ではコーヒーの抽出に6時間ほどかかります。

To be continued.
続く。
 
Edited to add:
追記:
 
6 hours later, I got 300 cc very strong coffee.
6時間後、とても濃いコーヒーが300 ccできました。
I still got some ice left in the bottle.
ボトルには氷がまだ少し残っていました。 
I was curious to know if the coffee grounds still had any flavorful components left in them, so I poured some hot water, 
コーヒーかすにまだ旨味成分が残っているか知りたかったので、お湯を入れて、 
I got this amount of coffee. I drank some of it, and decided to throw it away.
コーヒーがこれだけできました。少し飲んで、捨てることにしました。 
The coffee grounds now look like this:
コーヒーかすはこんな感じになりました。 
In the video, Nakagawa-san suggests making affogato with the "iced-brewed" coffee. Instead, I simply poured some of it, unheated, over ice cream.
ビデオでは、中川さんは「氷だし」コーヒーでアフォガートを作ることを勧めていますが、私は温めずに、アイスクリームにかけて食べました。 
Very good!
とても美味しいです!

August 2, 2013

Learning from Shukan Flavor/週間フレーバーで学ぶ

Flavor Coffee, run by NAKAGAWA Masashi, broadcasts the program, "Shukan Flavor" (Shukan = Weekly), live on USTREAM on Wednesday, starting at 9:00 p.m. The program is later uploaded to YouTube. Many of the editions are about coffee, and you can learn a lot from them (if you understand Japanese).
中川正志さんが経営するフレーバーコーヒーは、水曜日、午後9時からUSTREAMで「週刊フレーバー」という番組を生放送しています。その番組は後でYouTubeにアップされます。その番組の多くはコーヒーに関するもので、たくさんのことを学ぶことができます(日本語が分かれば、ですが)。

Weekly Flavor on USTREAM/USTREAMの週刊フレーバー

(Message to Dan: I selected this Edition, 28, first because it answers all of your questions.)
(From here on, Japanese text omitted to save time)
(Danさんへのメッセージ:最初に28番を選びました。Danさんの質問すべてに答えているので。)
(以降、時間節約のため、和文省略)

In Weekly Flavor 28 (not 29), Trying Different Gadgets, Nakagawa-san compares three different types of cone-shaped dripper:
Matsuya-style wire frame dripper,
Kono's meimon dripper, and
Hario's Ensui Dripper (made of glass, not plastic).
(Ensui = Cone)

With these three drippers, he makes coffee IN THE MATSUYA WAY, and measures the time it takes to brew 300 cc coffee from 50 g coarsely ground coffee, as well as the weight of the liquid that remains in each dripper.

Results:
Matsuya: 36 g, 1 m 45 s
Kono: 32 g, 1 m 13 s
Hario: 32 g, 1 m 09 s

While he stresses the fact that Kono's and Hario's drippers are NOT designed to make coffee in the Matsuya way, he points out the differences among the three due to ribs.
Matsuya: No ribs
Kono: Straight ribs in the lower half
Hario: Spiral ribs all the way from top to bottom

Sae-chan (the female assistant) agrees that Hario's dripper produces the weakest coffee. Nakagawa-san explains the reason in detail. When Hario's cone-shaped dripper with spiral ribs was first released, Nakagawa-san made various experiments with it, and concluded that the spiral ribs pulled water because of surface tension, resulting in rather weak coffee. He adds that Hario's cone-shaped dripper is a "follower product"  (Kono's cone-shaped dripper was released earlier), but Hario produces "cool-looking products", so their products have become quite popular.

Near the end of the program, Nakagawa-san talks a little about the Melitta and Kalita gadgets. He says that with the Melitta gadget, with a single hole, no water-pouring techniques are involved. You just pour water. With the Kalita gadget, with three holes, you need to pour water in several parts, so the water-pouring method becomes important.
***

I will provide some more details about this video when I have enough time.

Edited on Aug. 5 to add the following:
Other things I have learned from the video:
1. The Matsuya method is no different from the nel (flannel) method in that they do not depend on ribs, brewing coffee only by gravity.
2. At 36:30 and after, Nakagawa-san explains how to pour water from a drip pot. He uses his thumb, not wrist, to control the water flow. He says that human fingers are tireless, so you can pour water endlessly this way. To move the pot in a circle, he uses his shoulders and elbow, not wrist.
3. At 55:26, Nakagawa-san shows the spiral wire-frame dripper that he previously made. He once brewed coffee for 20 cups with the dripper, and found that the resulting coffee was weaker. He has a feeling (has not yet confirmed) that spirals tend to quicken the water flow.